Install PHP
Last updated onIn this tutorial, you will learn how to install PHP on your Operating system such as Ubuntu, Windows, or macOS. The process is clear; by the end, you will have PHP ready to run your scripts.
First, You need to set up your environment. Installing PHP is like assembling the toolkit you need to start your projects. Here is an overview of the process:
- Choose Your Platform
- Install Required Software
- Download PHP
- Configure Your Environment
- Test Your Installation
PHP is compatible with Windows, macOS, and Linux, so pick the one you are working on. It often works alongside tools like a web server (e.g., Apache or Nginx) and a database system (e.g., MySQL).
Installing PHP on Different Operating Systems
Whether you use Windows, macOS, or Linux, there are several methods to install PHP based on your needs. Let's look at the most common method for each operating system.
Installing PHP on Windows
Windows users have two main options: using an all-in-one package like XAMPP or WAMP or performing a manual installation.
Install PHP and MySQL using XAMPP or WAMP
XAMPP Installation
Before we explain how to install XAMPP, we must define what XAMPP stands for. The letters in XAMPP represent 'Cross-Platform (X), Apache HTTP Server (A), MySQL (M), PHP (P), Perl (P).' It is an environment that allows us to create a local web server on our machine.
To install XAMPP follow the below steps one by one.
Open your browser and go to this URL apachefriends.org. In the next step, you must select the proper installation according to your operating system. It can work on Windows, macOS, and Linux.
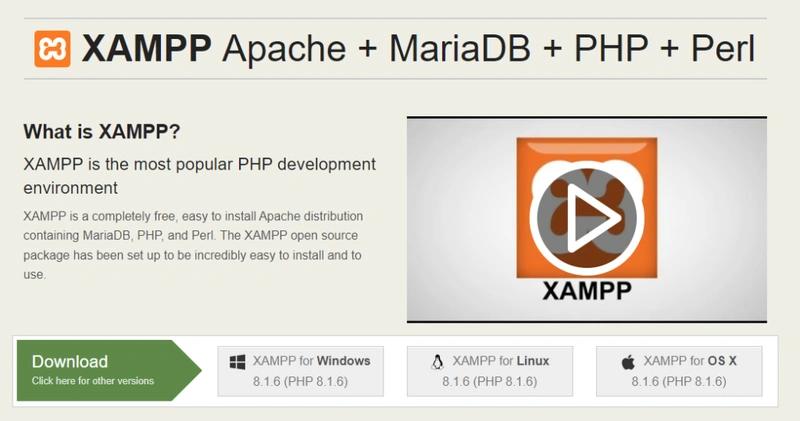
You have to double-click on the installer after the download is completed.
The program will show you a welcome screen like the below image, you have to click on the Next button.
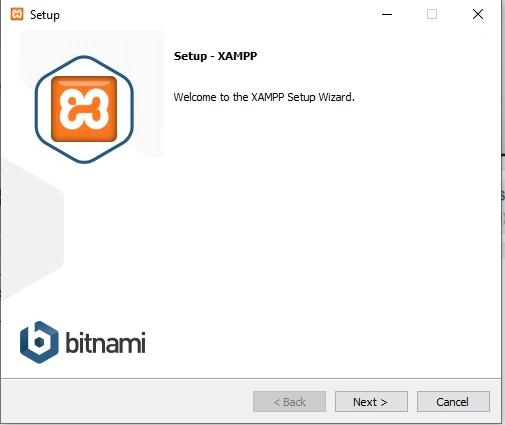
The following screen will display the program components. Leave the default choices as they are and click the Next button.
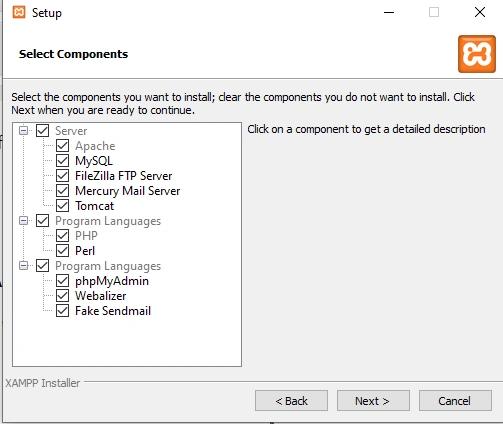
The following screen will display the program components. Leave the default choices as they are and click the Next button.

In the next step, the program will display a screen showing the installation location. You can either choose a new path for the installation or keep the default path.
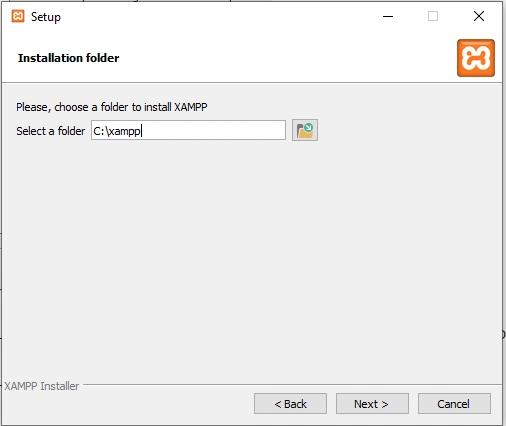
The next screen will present an option to select the application language. Choose your preferred language, then click the Next button.
On the following screen, you will see an option to install Bitnami for XAMPP. This is optional, so simply click the Next button to proceed. Finally, on the last screen, click the Next button again to start the installation.
In the final step, on the completion screen, click the Finish button to complete the installation.
Your PHP projects should be placed in the htdocs folder, located at C:\xampp\htdocs on your machine. To view your project's output, open your browser and navigate to http://localhost/your_project_folder.
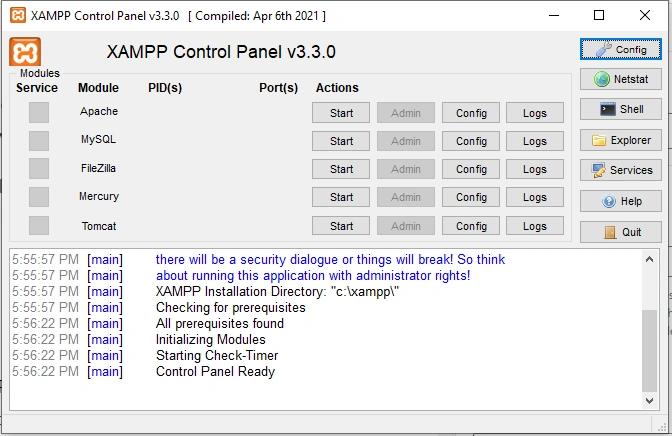
The above screenshot is the final image showing the XAMPP Control Panel. From here, you can start or stop any of the services, such as Apache or MySQL, as needed.
WAMP Installation
WampServer is an environment designed to help users create web applications on their local machine using the Windows operating system. The term WAMP stands for Windows, Apache, MySQL, and PHP, all bundled together in a single installation.
To install WampServer on Windows, start by navigating to the official WampServer website.
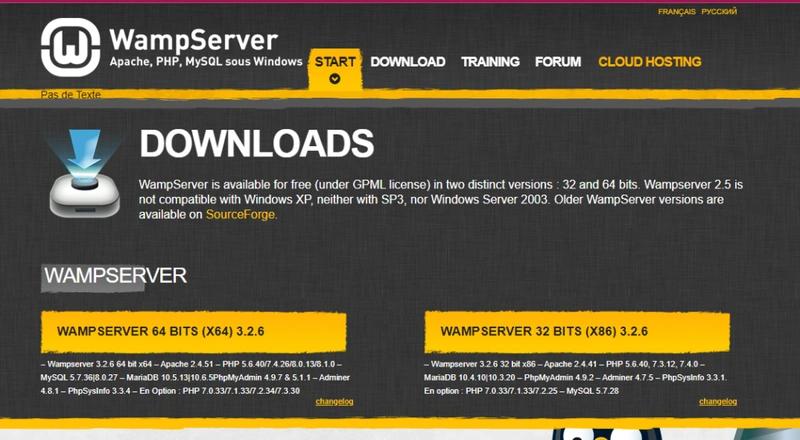
To download the installer, click the appropriate button for your Windows system type (64-bit or 32-bit), as shown in the image above.
A pop-up box will appear containing warning messages and an empty form. Do not worry about these messages—simply click the download link to proceed. Alternatively, you can choose to download it directly.
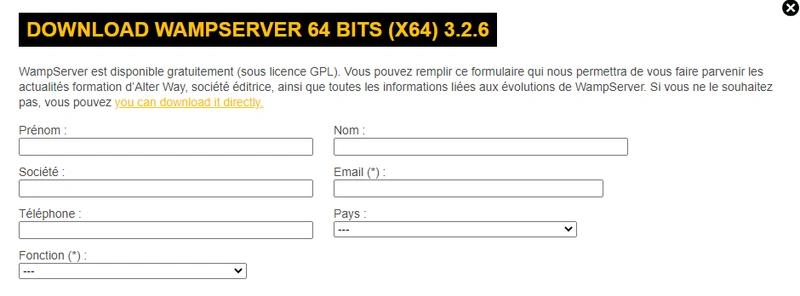
The installation is downloading. Once it is complete, double-click the file to begin. Follow the steps provided in the setup process to complete the installation.
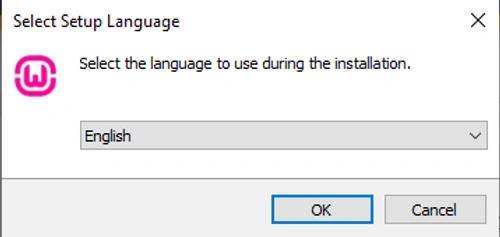
In the image above, select the language for the WampServer installation. Next, the license agreement screen will appear. After accepting the terms, click on the next button. Then, you have to accept terms to complete the setup and click on the next button to proceed.
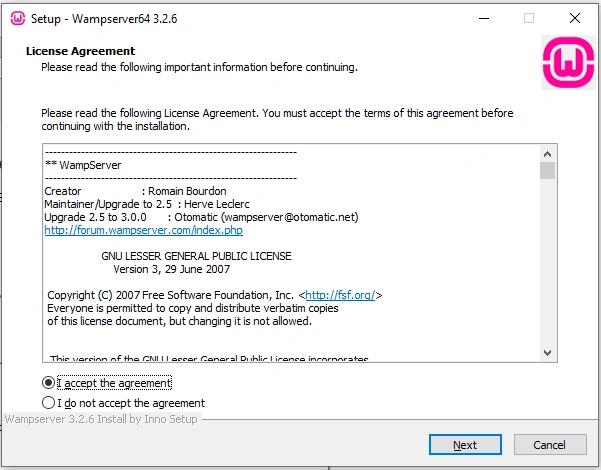
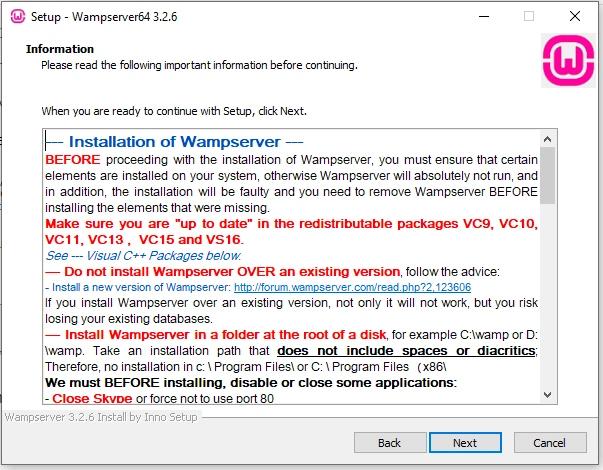
In the next step, you will see some information about WampServer. Simply click the Next button to continue.
Then it will ask you what the destination location for this installation is. We advise you to remain on the default path.
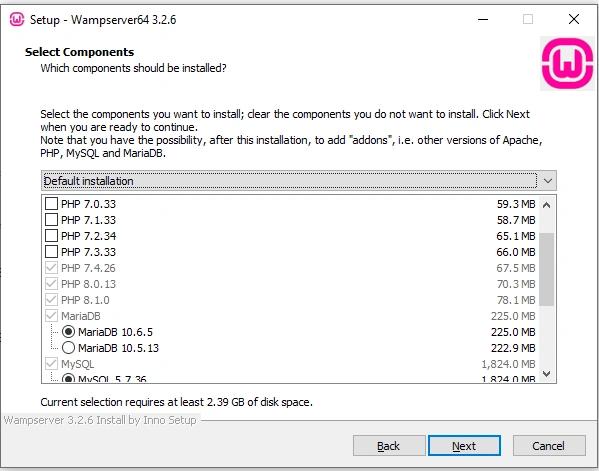
In the next step, the program will show you another screen containing all components of the WampServer installation. You just need to choose the required versions of each package. Some default components, like Apache and the default PHP version, are installed automatically with the software package.
The next step will display a screen asking you to select the Start Menu folder location. Simply keep the current default option.
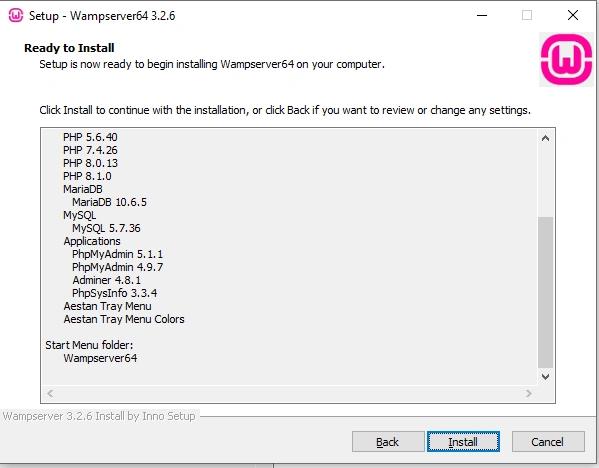
Here, the final screen of the installation will display a summary of the options you selected earlier. Simply click the Install button to proceed.
Once the installation is finished, simply click the Finish button.
Common Errors with WampServer
If you face any problems, you just have to ensure that your machine has the following needed apps besides Wamp:
- Visual C++ Packages
- You already have an old version of Wamp on your machine.
Here is the final app after completing its installation.
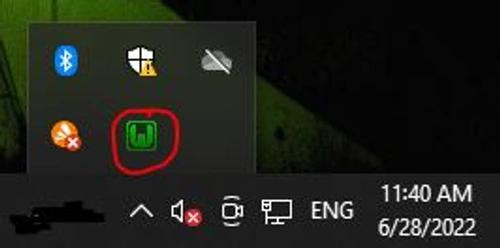
Once you click on this icon it will show you the components of WampServer like in the below image:
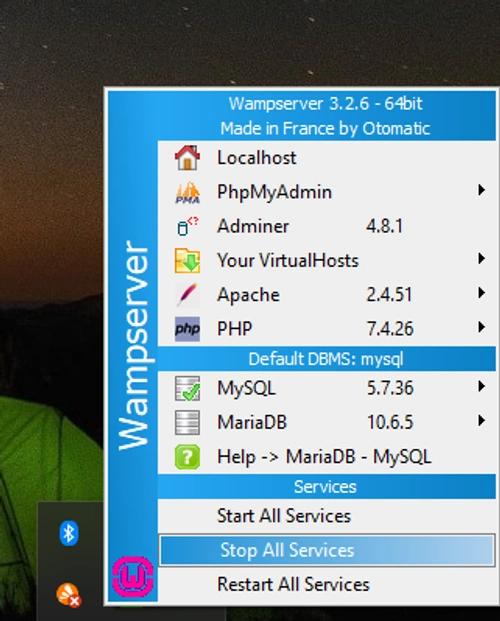
In the following section, you will learn how to install PHP on Windows using a different method. Let us move on.
Manual Installation Steps
Go to the official PHP website and grab the latest version of PHP that matches your system (Windows, in this case). You will typically find multiple options—choose the Thread Safe version if you are planning to use it with a web server like Apache. Once the download is complete, keep the file handy.
Now that you have the PHP zip file, extract its contents to a directory of your choice. A common and convenient location is: C:\php.
This directory will act as your PHP home.
To run PHP commands from anywhere in your system, you need to tell your operating system where to find it. Here is how to add PHP to your PATH environment variable:
- Search for Environment Variables in your Windows Start menu and open the "Edit the system environment variables" option.
- In the System Properties window, you will find Environment Variables.
- Under the System Variables section, look for a variable named
Pathand select Edit. - Add a new entry pointing to the directory where you extracted PHP, like:
C:\php. - Save your changes and restart any terminal or command prompt windows to apply the update.
Here is the final result:
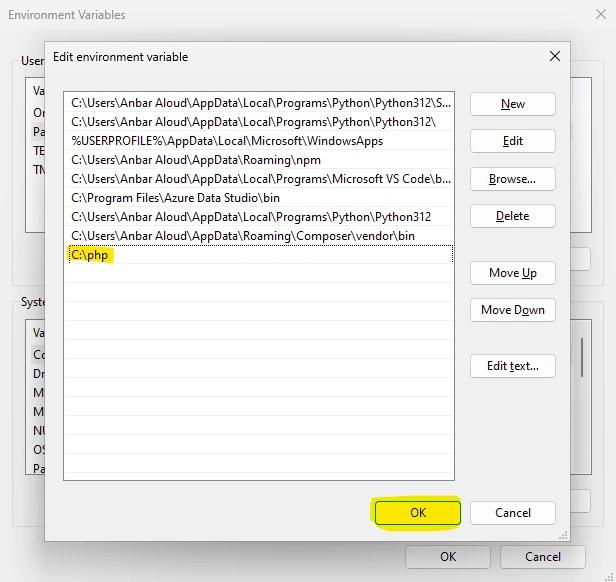
This step ensures you can execute PHP commands globally, without navigating to the PHP directory every time.
Let's move on to the section below to understand how to install PHP on macOS.
Installing PHP on macOS
To install PHP and have greater control over your PHP installation, Homebrew is your best choice.
If Homebrew is not installed on your operating system, open the Terminal and paste the following command:
/bin/bash -c "$(curl -fsSL https://raw.githubusercontent.com/Homebrew/install/HEAD/install.sh)"Once installed, verify it by typing:
brew --versionTo install PHP, use the following command:
brew install phpThis will fetch and install the latest PHP version available via Homebrew. Once the installation is complete, check the PHP version by typing:
php -vYou should see an output showing the installed PHP version.
Homebrew will automatically manage your PHP binary path. However, if you encounter issues, you may need to ensure that Homebrew's PHP is prioritized in your PATH. Add the following to your .zshrc or .bash_profile file:
export PATH="/usr/local/bin:$PATH"After making changes, run:
source ~/.zshrcIf you need to switch between different PHP versions, Homebrew can help you to do that. For example, to install PHP 7.4 alongside the latest PHP:
brew install php@7.4Switch to PHP 7.4 by linking it:
brew unlink php && brew link php@7.4You can verify the active version with php -v.
Anyway, in the following section, you will learn how to install PHP on Linux and Ubuntu.
Installing PHP on Linux
Installing PHP Using Package Managers
Install PHP on Debian or Ubuntu Distributions (apt)
To install PHP, you must ensure your package list is up to date on Ubuntu or Debian:
sudo apt update
sudo apt upgrade
Use the apt package manager to install PHP along with common extensions:
sudo apt install php libapache2-mod-php php-mysqlVerify the Installation by checking the installed version: php -v.
To Restart the Apache Server to apply changes run this command:
sudo systemctl restart apache2Install PHP on Hat/CentOS-based Distributions (yum)
Before you start the PHP installation, you need to ensure your system is updated:
sudo yum updateAnd then enable EPEL and Remi repositories which provide the latest PHP versions:
sudo yum install epel-release yum-utils
sudo yum install http://rpms.remirepo.net/enterprise/remi-release-7.rpm
Install PHP and enable the desired version from Remi:
sudo yum-config-manager --enable remi-php8.2
sudo yum install php php-mysqlnd
Let's move on to the section below to learn another method for installing PHP.
Manual Installation from Source
If you need a custom PHP setup, compiling PHP from source gives you full control.
Install required dependencies before you start (tools and libraries):
sudo apt update
sudo apt install build-essential libxml2-dev libssl-dev libcurl4-openssl-dev libjpeg-dev libpng-dev libonig-dev libzip-dev
Then, download the PHP source code from the official PHP website and select the latest release:
wget https://www.php.net/distributions/php-x.x.x.tar.gz
tar -xvzf php-x.x.x.tar.gz
cd php-x.x.x
Then, run the ./configure script with desired options. Here is an example for Apache:
./configure --with-apxs2=/usr/bin/apxs --with-mysqli --with-zlib --enable-mbstring --enable-zip --with-curl --with-opensslUse make to compile the source code and then install it:
make
sudo make install
Then, copy the default PHP configuration file to the proper location:
sudo cp php.ini-development /usr/local/lib/php.iniOnce you finished, just confirm the installation by running this command php -v. Then restart the web server to apply changes:
sudo systemctl restart apache2 # For Debian-based systems
sudo systemctl restart httpd   # For Red Hat-based systems
Let's summarize it.
Wrapping Up
Congratulations! You now have a great understanding of how to install PHP on your system, regardless of whether you are using Windows, macOS, or Linux. Each operating system has its steps, but the goal is the same: to equip you with a PHP environment.
Install all from packages like XAMPP and WAMP on Windows to Homebrew on macOS, and even the manual control of compiling PHP from source on Linux like Ubuntu, and Debian, you have learned the key methods to set up PHP tailored to your needs. Along the way, you have learned how to integrate PHP with web servers, configure your environment, and test your installation to ensure everything works.
Ready to build something amazing? Share your first PHP project idea below or let us know if you ran into any hiccups during the installation—we are here to help!
Frequently Asked Questions (FAQs)
How do I install PHP and MySQL on Windows?
What’s the difference between WAMP and XAMPP?
How can I install PHP on Linux?
How do I install PHP on macOS?
How do I create a PHP project using WAMP or XAMPP?
What is the "htdocs" folder in XAMPP?
Why is my WAMP server showing a red or orange icon?
How do I restart Apache on Linux after installing PHP?
Can I run PHP without a server like Apache?
How do I install PHPStorm IDE for PHP development?
Did you find this tutorial useful?
Your feedback helps us improve our tutorials.