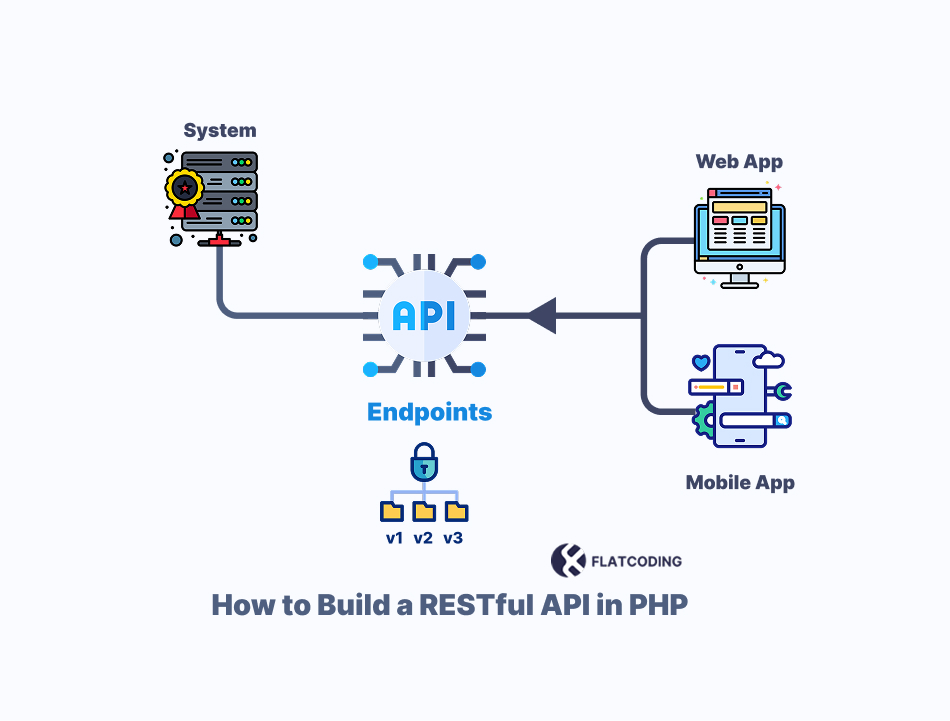
Web or mobile apps need clean ways to communicate with other systems. RESTful APIs let PHP handle that. They send and get data using simple HTTP methods like GET and POST.
You can connect it to mobile apps or frontend frameworks. Also, you can use it in third-party tools. Each part of your app stays separate, so changes don’t break everything.
In this article, you will learn how RESTful APIs work in PHP, and you will also build a full application as a practical example.
So let’s start with the main concept and understand how they work.
What Does RESTful API Mean?
A RESTful API is a way for different systems to talk to each other over the web using simple rules. REST means “Representational State Transfer” while the term “API” means “Application Programming Interface”.
A RESTful API uses REST rules. It allows one program to talk to another.
So, what makes an API RESTful?
RESTful API works over HTTP. It follows six main rules:
- The client and server are separate entities. The client is responsible for the user interface and user experience, while the server manages data storage and business logic. This separation allows each to be developed and scaled independently.
- Each request stands alone. The server does not store anything from earlier requests.
- Data from responses can be stored for faster results later.
- The system uses fixed rules. It uses HTTP methods like (
GET,POST,PUT, andDELETE). - The client does not need to know if it communicates to one server or several.
- The server can send code to the client if needed. This is not used often (optional).
Let’s move on to the following part to learn the types of HTTP requests.
What are HTTP Request Types?
A RESTful API lets you send a request using a URL and an HTTP method. The server responds with data in JSON format.
Here are the method types used in HTTP requests:
- GET retrieves data.
- POST adds new data.
- PUT updates the data.
- DELETE removes data.
Here are examples:
POST → /api/user/add
This API stores the data of a newly registered user in the database. It uses the POST method in the HTTP request.
GET → /api/user/get/10
This one retrieves data for a specific user who has already been stored with the ID of 10.
PUT → /api/user/modify/5
Here, it updates the data of the user listed with the ID 5.
DELETE → /api/user/delete/1
This API deletes the user with the ID 1.
The URL is called an endpoint. It points to the resource. The HTTP method tells the server what to do with it.
Here is an example with a real response from the API in JSON format:
{
  "name": "Juvani Doe",
  "age": 30,
  "job": "Software Developer",
  "bio": "A software developer who builds websites and web tools with care and focus.",
  "email": "[email protected]",
  "phone": "+1234567890",
  "address": {
    "street": "123 Main St",
    "city": "Springfield",
    "state": "IL",
    "zip": "62701"
  }
}
This data is used by the client (like a web or mobile application) to display or manage user information. But how do you do that in PHP?
Let’s move on to the part below to learn how, step by step.
Set Up the PHP Environment
You have to install PHP and set it up with a web server like Apache or Nginx, and then configure the server settings.
What you change will depend on your operating system.
Then you need to clean up the API URLs. Instead of something like this:
index.php?page=about
It becomes a simple path like this:
about
Here are the steps to enable it based on your web server:
Apache Configuration
Enable mod_rewrite
The mod_rewrite is an Apache module used to rewrite URLs based on regular expressions. It allows you to create user-friendly and clean URLs for your web application:
1- Open the Apache configuration file (httpd.conf):
This file is usually located in the following directory. It depends on your environment:
- For XAMPP (Windows):
C:\xampp\apache\conf\httpd.conf - For Linux:
/etc/apache2/apache2.confor/etc/httpd/conf/httpd.conf
Then open the file in Notepad or any text editor.
2- Find and enable mod_rewrite:
Search for the mod_rewrite module and remove the # at the beginning of the line if it is commented out.
#LoadModule rewrite_module modules/mod_rewrite.soIt should become:
LoadModule rewrite_module modules/mod_rewrite.soApache won’t be able to handle URL rewriting without this setting, and .htaccess file will be ignored.
Configure Directory AllowOverride to Enable .htaccess
A .htaccess file allows you to override default settings for a specific directory or location on your server.
Follow the steps below to enable Apache to process .htaccess files:
1- Find the Directory block for htdocs:
Find the block that defines the <Directory> for your web root inside the same httpd.conf file. The root directory is usually htdocs in XAMPP. This block typically looks something like this:
<Directory "C:/xampp/htdocs">
    Options Indexes FollowSymLinks
    AllowOverride None
    Require all granted
</Directory>
This block applies settings to the htdocs directory, which is the default web root for your local server in XAMPP.
2- Change AllowOverride None to AllowOverride All:
The AllowOverride directive controls whether .htaccess files can override settings in the Apache configuration.
Here are the cases:
AllowOverride Nonedisables the use of.htaccessfiles. Apache will ignore any.htaccessfile present in the directory.AllowOverride Allallows.htaccessfiles to override Apache’s default settings.
So, you have to change this line from:
AllowOverride None
to:
AllowOverride All
Then save and close the httpd.conf and restart Apache. Run the following command if you are using Linux:
sudo systemctl restart apache2Or, restart the XAMPP/WAMP server based on what you are using for Windows.
Add .htaccess Inside your api/ Folder
Create a .htaccess file inside the api folder (same level as index.php), with this:
RewriteEngine On

# Redirect all requests to index.php
RewriteCond %{REQUEST_FILENAME} !-f
RewriteCond %{REQUEST_FILENAME} !-d
RewriteRule ^ index.php [QSA,L]
The rule checks if the requested file or folder exists. If it does not, it passes the request to index.php.
Nginx Configuration
You set up URL rewriting differently in Nginx. Nginx does not use .htaccess files. You handle everything inside the main Nginx configuration file.
The steps below explain how to set up the same kind of URL rewriting that .htaccess and mod_rewrite handle in Apache.
Nginx configuration files are usually found in:
- Ubuntu/Debian:
/etc/nginx/sites-available/. - CentOS/RHEL:
/etc/nginx/conf.d/or/etc/nginx/nginx.conf.
The path may be different if you are using a local server like Laravel Valet or Docker.
You should look for the configuration for your site. For example:
sudo nano /etc/nginx/sites-available/your-site.confOr if you are using the default site:
sudo nano /etc/nginx/sites-available/defaultLet’s say you want all URLs like /about, /contact, etc., to load through index.php. You can use the try_files directive inside the location block.
Here is an example:
server {
    listen 80;
    server_name yoursite.test;
    root /var/www/html/yourproject/public;

    index index.php index.html;

    location / {
        try_files $uri $uri/ /index.php?$query_string;
    }

    location ~ \.php$ {
        include snippets/fastcgi-php.conf;
        fastcgi_pass unix:/run/php/php8.2-fpm.sock;
        fastcgi_param SCRIPT_FILENAME $document_root$fastcgi_script_name;
        include fastcgi_params;
    }

    location ~ /\.ht {
        deny all;
    }
}
This line tells Nginx:
- Try to load the file at the URL (like
/about.html) - Then, try a directory with that name (like
/about/) - Send the request to
index.phpif neither exists. It passes the query string (?page=about)
Save the configuration and test it with the following command:
sudo nginx -tReload Nginx if everything is OK:
sudo systemctl reload nginxRun this command if you are not using systems:
sudo service nginx reloadMake sure you have PHP-FPM running. The fastcgi_pass line should match your PHP version. Here are the common socket paths:
- PHP 8.2:
/run/php/php8.2-fpm.sock. - PHP 7.4:
/run/php/php7.4-fpm.sock.
In the following section, we will focus on how to enable Cross-Origin Resource Sharing (CORS) for your PHP-based RESTful API.
Enable CORS in a PHP RESTful API
The browser blocks the request if your frontend runs on a different domain or port from your PHP backend. You must enable CORS (Cross-Origin Resource Sharing) to allow one domain to communicate with another.
You need to send CORS headers in your PHP response. Place this code at the top of your PHP file before any output:
header("Access-Control-Allow-Origin: *");
header("Access-Control-Allow-Methods: GET, POST, PUT, DELETE, OPTIONS");
header("Access-Control-Allow-Headers: Content-Type, Authorization");
Here is what each line does:
- The “
Access-Control-Allow-Origin” allows all domains to access your API. You can replace ‘*’ with a specific domain if needed. - The “
Access-Control-Allow-Methods” tells the browser what HTTP methods are allowed. - “
Access-Control-Allow-Headers” lists the headers your API accepts. This is needed if you send JSON or an authorization token.
We will explore routing and how it directs incoming requests to the appropriate PHP functions or controllers in the following part.
How to Handle Routing in a PHP RESTful API
Your API must match the request with the right action. This step is called ”routing”.
Use PHP’s built-in features to write basic route logic. This works well in small projects or when you study how APIs behave.
Here is an example:
$requestMethod = $_SERVER['REQUEST_METHOD'];
$requestUri = $_SERVER['REQUEST_URI'];

switch ($requestMethod) {
    case 'GET':
        if ($requestUri === '/api/user/get/10') {
            // return user data
        }
        break;
    case 'POST':
        if ($requestUri === '/api/user/add') {
            // create user
        }
        break;
    case 'PUT':
        if ($requestUri === '/api/user/modify/5') {
            // update user
        }
        break;
    case 'DELETE':
        if ($requestUri === '/api/user/delete/1') {
            // delete user
        }
        break;
    default:
        http_response_code(405);
        echo json_encode(["message" => "Method not allowed"]);
}
Here is how it works:
- First, it reads the request method (GET, POST, etc.) and the request URI.
- Then, it checks the method with a switch statement.
- Each case compares the URI to a fixed path.
- It returns a 405 status and an error message if none match.
- You can also write this type of routing inside a micro-framework like Slim or Lumen.
You can also do that within a micro-framework such as Slim or Lumen.
Handle Requests and Responses in a PHP RESTful API
Your API must read the request and return a clear response. This step includes:
- Query parameters.
- Request body.
- Headers.
- JSON response.
Those are with the correct status code.
You can use PHP functions or framework tools to read data from the request.
// Get query parameters: /api/user?id=5
$id = $_GET['id'] ?? null;

// Get raw body data (for POST, PUT)
$body = file_get_contents('php://input');
$data = json_decode($body, true);

// Get headers
$headers = getallheaders();
$authToken = $headers['Authorization'] ?? '';
Your API must return a response that the client can use. That means a JSON response in most cases.
Here is an example:
$data = ['message' => 'User created'];
header('Content-Type: application/json');
http_response_code(201);
echo json_encode($data);
You will see how to return proper status codes in the next part.
Setting Proper HTTP Status Codes
Use a status code that tells the client what happened. Here are some common ones:
200 OKmeans that everything worked201 Createdrefers to that you have created something new204 No Contentmeans no data to return, but the request was fine400 Bad Requestrefers to that the request was not valid401 Unauthorizedmeans missing or bad credentials404 Not Foundmeans the requested item does not exist500 Internal Server Errorrefers to something broken on the server
You can use these codes in any part of your API.
Response Format
A clear response format helps clients use your PHP API. It also makes errors easier to find.
Use JSON in every response. Stick to one layout. That layout should work for both success and error responses.
Each response includes these fields:
data: the main contentmessage: a short noteerrors: appears only if something fails
Here is a successful response example:
{
  "data": {
    "id": 42,
    "title": "Post title",
    "body": "Post content here"
  },
  "message": "Post retrieved successfully",
  "errors": null
}
Error response example:
{
  "data": null,
  "message": "Validation failed",
  "errors": {
    "title": "Title is required",
    "body": "Body must be at least 10 characters"
  }
}
The following function shows you how to return JSON:
function jsonResponse($data = null, $message = '', $errors = null, $statusCode = 200) {
    http_response_code($statusCode);
    header('Content-Type: application/json');
    echo json_encode([
        'data' => $data,
        'message' => $message,
        'errors' => $errors
    ]);
    exit;
}Pagination:
Break the API into pages if it returns a list. It includes these fields:
current_pageper_pagetotallast_pagedata: the items list
Here is a response example:
{
  "data": [
    { "id": 1, "title": "Post 1" },
    { "id": 2, "title": "Post 2" }
  ],
  "message": "Posts list",
  "errors": null,
  "pagination": {
    "current_page": 1,
    "per_page": 10,
    "total": 25,
    "last_page": 3
  }
}
The following example shows you how to handle manual pagination in PHP:
$page = isset($_GET['page']) ? (int) $_GET['page'] : 1;
$perPage = 10;
$offset = ($page - 1) * $perPage;

$stmt = $pdo->prepare("SELECT * FROM posts LIMIT :offset, :perPage");
$stmt->bindValue(':offset', $offset, PDO::PARAM_INT);
$stmt->bindValue(':perPage', $perPage, PDO::PARAM_INT);
$stmt->execute();
$posts = $stmt->fetchAll();

$totalStmt = $pdo->query("SELECT COUNT(*) FROM posts");
$total = $totalStmt->fetchColumn();
$lastPage = ceil($total / $perPage);

jsonResponse($posts, 'Posts list', null, 200, [
    'current_page' => $page,
    'per_page' => $perPage,
    'total' => $total,
    'last_page' => $lastPage
]);
Let’s move to the following section to take a quick look at the CRUD operations from the top.
CRUD Operations within a PHP RESTful API
You can connect your API to a database. This part uses real data and shows how the basic CRUD actions, such as:
- Create.
- Read.
- Update.
- Delete.
You can use either PDO or MySQLi with MySQL. PDO gives you more options if you use other database types.
Here is a simple PDO setup:
$host = 'localhost';
$db   = 'your_database';
$user = 'your_username';
$pass = 'your_password';

try {
    $pdo = new PDO("mysql:host=$host;dbname=$db;charset=utf8", $user, $pass);
    // Set error mode
    $pdo->setAttribute(PDO::ATTR_ERRMODE, PDO::ERRMODE_EXCEPTION);
} catch (PDOException $e) {
    echo 'Connection failed: ' . $e->getMessage();
    exit;
}
We defined many variables, such as (host and database name, etc). Also, we have enabled exceptions so you can catch and show errors.
Create (POST /api/user/add):
if ($_SERVER['REQUEST_METHOD'] == 'POST' && $_SERVER['REQUEST_URI'] == '/api/user/add') {
    $data = json_decode(file_get_contents('php://input'), true);
    $stmt = $pdo->prepare("INSERT INTO users (name, email) VALUES (:name, :email)");
    $stmt->execute([
        'name' => $data['name'],
        'email' => $data['email']
    ]);

    http_response_code(201);
    echo json_encode(['message' => 'User added']);
}
Here we checked if the request method is POST and the path matched the create route.
It reads JSON input and stores the user’s name and email. Additionally, it returns a 201 status and a message if it works.
Read (GET /api/user/get/{id}):
if ($_SERVER['REQUEST_METHOD'] == 'GET' && preg_match('/^\/api\/user\/get\/(\d+)$/', $_SERVER['REQUEST_URI'], $matches)) {
    $id = $matches[1];
    $stmt = $pdo->prepare("SELECT * FROM users WHERE id = :id");
    $stmt->execute(['id' => $id]);
    $user = $stmt->fetch(PDO::FETCH_ASSOC);

    if ($user) {
        echo json_encode($user);
    } else {
        http_response_code(404);
        echo json_encode(['message' => 'User not found']);
    }
}
This part checks for a GET request with a user ID in the URL. It uses a regular expression to extract the ID and also queries the database for that user.
It returns the data as JSON with a 404 error if the user does not exist.
Update (PUT /api/user/modify/{id}):
if ($_SERVER['REQUEST_METHOD'] == 'PUT' && preg_match('/^\/api\/user\/modify\/(\d+)$/', $_SERVER['REQUEST_URI'], $matches)) {
    $id = $matches[1];
    $data = json_decode(file_get_contents('php://input'), true);
    $stmt = $pdo->prepare("UPDATE users SET name = :name, email = :email WHERE id = :id");
    $stmt->execute([
        'name' => $data['name'],
        'email' => $data['email'],
        'id' => $id
    ]);

    http_response_code(204); // No Content
}
This checks for a PUT request with a user ID and reads the input data. Also, it updates the user’s name and email in the database. It returns a 204 No Content status with no body if it succeeds.
Delete (DELETE /api/user/delete/{id}):
if ($_SERVER['REQUEST_METHOD'] == 'DELETE' && preg_match('/^\/api\/user\/delete\/(\d+)$/', $_SERVER['REQUEST_URI'], $matches)) {
    $id = $matches[1];
    $stmt = $pdo->prepare("DELETE FROM users WHERE id = :id");
    $stmt->execute(['id' => $id]);

    http_response_code(204); // No Content
}
This removes a user from the database. It looks for a DELETE request with a user ID and prepares a delete query. It sends a 204 No Content response if the action works.
You now understand how to use the CRUD system in your API. But what happens when someone sends input to your system or database?
You must check and clean that input to protect your API. You will see how to do that in the following sections.
PHP RESTful API Security
You must protect your system from attacks and keep data safe when you build an API. Here are some steps to use in a PHP API:
- Check each value that comes from outside and clean it before use. Do not trust raw input.
- Use encryption for requests and responses. This blocks others from access to data or any change to it while data moves through the network.
- Require a valid token or API key for each request on protected routes.
- Limit access. Let each user or client reach only what they need.
- Use prepared statements. This blocks SQL injection.
- Set a limit for how many requests one user or IP can make.
- Hide system details. Keep your responses short and safe.
- Store API keys and tokens in environment files. Never put them in the code.
Here are examples:
Check that the required data is present and safe to use:
$username = $_POST['username'] ?? '';
if (!preg_match('/^[a-zA-Z0-9_]{3,20}$/', $username)) {
    http_response_code(400);
    echo json_encode(['error' => 'Invalid username']);
    exit;
}
Force HTTPS by redirecting HTTP requests:
if (empty($_SERVER['HTTPS']) || $_SERVER['HTTPS'] === 'off') {
    $redirect = 'https://' . $_SERVER['HTTP_HOST'] . $_SERVER['REQUEST_URI'];
    header('Location: ' . $redirect);
    exit;
}
Protect routes with a simple API key check:
$headers = getallheaders();
$apiKey = $headers['Authorization'] ?? '';

if ($apiKey !== 'your-secret-api-key') {
    http_response_code(401);
    echo json_encode(['error' => 'Unauthorized']);
    exit;
}
Only allow certain actions for admins:
$userRole = $_SESSION['role'] ?? 'guest';
if ($userRole !== 'admin') {
    http_response_code(403);
    echo json_encode(['error' => 'Forbidden']);
    exit;
}
Don’t concatenate user input directly into SQL queries. Instead, always use parameterized queries.
Wrong:
$query = "SELECT * FROM users WHERE email= '$email'";Right (Use PDO with prepared statements to sanitize database queries):
$stmt = $pdo->prepare('SELECT * FROM users WHERE email = :email');
$stmt->execute(['email' => $_POST['email']]);
$user = $stmt->fetch();
This prevents SQL Injection.
Rate-limit requests:
session_start();
$now = time();
$_SESSION['last_request'] = $_SESSION['last_request'] ?? 0;

if ($now - $_SESSION['last_request'] < 1) {
    http_response_code(429);
    echo json_encode(['error' => 'Too many requests']);
    exit;
}

$_SESSION['last_request'] = $now;
Use .env files with a loader like vlucas/phpdotenv to store secret keys.
$apiKey = getenv('API_KEY');Validation and Error Control in a PHP RESTful API
You should check if client data is valid before you use it. Set rules for required fields or allowed formats. Also, you can set value limits. That helps block invalid data.
Here is a basic check for a POST request:
$data = json_decode(file_get_contents('php://input'), true);

$errors = [];

if (empty($data['name'])) {
    $errors[] = 'Name is required.';
}

if (empty($data['email'])) {
    $errors[] = 'Email is required.';
} elseif (!filter_var($data['email'], FILTER_VALIDATE_EMAIL)) {
    $errors[] = 'Email is not valid.';
}

if (!empty($errors)) {
    http_response_code(400);
    echo json_encode([
        'status' => 'error',
        'errors' => $errors
    ]);
    exit;
}
This code checks the input and shows messages for each issue. Then, it sends a 400 response if something fails.
Also, it continues with the request if the input ok and avoids plain text or HTML in your response.
The client can use JSON directly. Add a message and list any problems if needed.
For example:
http_response_code(400);
echo json_encode([
    'status' => 'error',
    'message' => 'Invalid input',
    'details' => [
        'email' => 'Email is not valid',
        'password' => 'Password must be at least 8 characters'
    ]
]);
exit;
This helps frontend apps show a proper feedback to users.
Also don’t forget to wrap database calls or risky operations in a try...catch block. Return an error with the correct HTTP status code if something wrong.
try {
    $stmt = $pdo->prepare("INSERT INTO users (name, email) VALUES (:name, :email)");
    $stmt->execute([
        'name' => $data['name'],
        'email' => $data['email']
    ]);

    http_response_code(201);
    echo json_encode(['message' => 'User created']);
} catch (PDOException $e) {
    http_response_code(500);
    echo json_encode([
        'status' => 'error',
        'message' => 'Server error. Please try again later.'
    ]);
}
This traps database issues and responds with a 500 code. The client always gets a valid JSON response even when something breaks on the server.
In the section below, you will understand how to add authentication and authorization to your RESTful API in PHP.
Authentication & Authorization
You have two main ways to do authentication and authorization in a PHP RESTful API:
- API key-based authentication allows the client to send a simple key with each request. The server checks if the key is valid.
- JWT (JSON Web Token) authentication allows the client to send a signed token in the header. The server verifies the token and reads the user info from it.
Let’s take a look at each one with an example in-depth.
API Key-Based Authentication
API key-based authentication uses a unique key to identify and authorize the client. The server gives this key to the client ahead of time through a secure registration process.
The client then includes the key in every request. It is usually in a header or query string, or request body.
The server checks the key to decide if the request is allowed. This method is simple to set up and works well for server-to-server communication or internal APIs.
But it does not carry user details or support roles, so it is not ideal for user-level access control.
Clients send the API key like this:
Authorization: your-secret-api-key
The server will check if that API key is valid or not. Here is an example:
// Add this check at the top of each protected route:
$headers = apache_request_headers();

/*
use getallheaders() if
apache_request_headers() is not available
*/

$apiKey = $headers['Authorization'] ?? null;

$validKey = 'your-secret-api-key';

if ($apiKey !== $validKey) {
    http_response_code(401);
    echo json_encode([
        'status' => 'error',
        'message' => 'Unauthorized'
    ]);
    exit;
}
This checks if the request includes a valid API key in the Authorization header. It reads the request headers in apache_request_headers() and looks for the key.
If the key does not match the expected value, it returns a 401 Unauthorized response in JSON and stops the script.
JWT (JSON Web Tokens)
JWT (JSON Web Token) is a method that uses a signed token to confirm identity. The server creates a token with user data and signs it with a secret key after a user logs in and sends it to the client.
The client adds this token to the Authorization header in each request. The server checks the token’s signature to confirm it is valid and reads the user data inside.
JWT does not depend on sessions, so the server does not store user state.
Use Composer to Install JWT in PHP
To use it, you need to install Composer and then run the following command:
composer require firebase/php-jwtHere is an example to create a token with JWT:
use Firebase\JWT\JWT;
use Firebase\JWT\Key;

$payload = [
    'user_id' => 1,
    'role' => 'admin',
    'exp' => time() + 3600 // 1 hour
];

$jwt = JWT::encode($payload, 'your-secret-key', 'HS256');
Here, we used the Firebase JWT library to create a JWT for authentication. It sets up the payload. It includes the user’s ID and expiration time (1 hour).
The JWT::encode function encodes the payload and signs it with a secret key (your-secret-key). It uses the HS256 algorithm and generates the token.
The token can then be sent to the client for use in future requests. That allows the server to verify the user’s identity.
Decode the Token of JWT in the PHP Server
The server decodes and checks the token once it receives the request. Here is an example:
$authHeader = getallheaders()['Authorization'] ?? '';
$token = str_replace('Bearer ', '', $authHeader);

try {
    $decoded = JWT::decode($token, new Key('your-secret-key', 'HS256'));
    $userId = $decoded->user_id;
    $userRole = $decoded->role;
} catch (Exception $e) {
    http_response_code(401);
    echo json_encode(['message' => 'Invalid token']);
    exit;
}
This code retrieves the Authorization header from the incoming request and removes the “Bearer ” prefix to extract the token.
It then decodes the token with the JWT::decode method with the secret key (your-secret-key) and the HS256 algorithm. It extracts the user_id and role from the decoded data if the token is valid.
If the token is invalid or expired, an exception is caught, and the server responds with a 401 Unauthorized status and an error message.
You can also define access levels for each route. That depends on what the role is allowed to do:
if ($userRole !== 'admin') {
    http_response_code(403);
    echo json_encode(['message' => 'Forbidden']);
    exit;
}
This code checks if the user’s role is not “admin”. It sends a 403 Forbidden response if the role does not match.
The server responds with a 403 status and a message stating “Forbidden”. Then, the script stops further execution with the exit statement.
Let’s move to the following section to understand how to use middleware in a PHP RESTful API.
Middleware Implementation with a PHP RESTful API
You can use middleware to check things or block requests, or even log actions. You can log each incoming request to a file.
Here is an example:
function logRequest($method, $uri, $body) {
    $log = date('Y-m-d H:i:s') . " $method $uri " . json_encode($body) . PHP_EOL;
    file_put_contents('request.log', $log, FILE_APPEND);
}

// Use it at the top of your main index.php file
logRequest($_SERVER['REQUEST_METHOD'], $_SERVER['REQUEST_URI'], $_REQUEST);
This helps you to track what clients are doing and can help you debug issues. Also, you can move your token check or API key validation into a middleware function.
For example:
function checkAuth() {
    $headers = getallheaders();
    $token = $headers['Authorization'] ?? null;
    $validToken = 'your-secret-token';

    if ($token !== $validToken) {
        http_response_code(401);
        echo json_encode(['message' => 'Unauthorized']);
        exit;
    }
}

// Call this before the route logic
checkAuth();
This helps you to secure your routes and handle access in one place.
You can also limit how often a user hits your API. Store their IP and request times.
function rateLimit($maxRequests = 100, $timeWindow = 60) {
    $ip = $_SERVER['REMOTE_ADDR'];
    $logFile = 'rate_limit.json';
    $log = file_exists($logFile) ? json_decode(file_get_contents($logFile), true) : [];

    $now = time();

    // Remove expired entries
    foreach ($log as $loggedIp => $timestamps) {
        $log[$loggedIp] = array_filter($timestamps, fn($ts) => $ts > $now - $timeWindow);
    }

    // Add this request
    $log[$ip][] = $now;

    if (count($log[$ip]) > $maxRequests) {
        http_response_code(429);
        echo json_encode(['message' => 'Too Many Requests']);
        exit;
    }

    // Save back to file
    file_put_contents($logFile, json_encode($log));
}

// Use it near the top
rateLimit();
This code defines a rateLimit function that limits the number of requests an IP address can make within a specified time window.
It checks the REMOTE_ADDR to identify the user’s IP and stores request timestamps in a rate_limit.json file. The function first removes expired entries, which are timestamps older than the defined time window.
Then it inserts the current request timestamp for the user’s IP.
If the number of requests from the same IP exceeds the allowed limit ($maxRequests), it sends a 429 Too Many Requests response and stops further processing.
The logFile is updated with the latest request data to track usage for future requests.
This works for low-traffic APIs, but if you have a larger app, you should store rate limits in a database.
Let’s move on to the next section to learn how to design a database for a PHP RESTful API.
Design a Database for a RESTful API in PHP
Each table in your database should match a type of resource in your API. Here is an example:
users→/api/usersposts→/api/postscomments→/api/comments
Each record has a unique ID. You use that ID in the URL to access it:
/api/users/15/api/posts/8/comments
You keep the structure simple. One table = one resource, and use clear column names.
Avoid spaces or special characters. Stick with lowercase and underscores:
CREATE TABLE users (
    id INT AUTO_INCREMENT PRIMARY KEY,
    name VARCHAR(100),
    email VARCHAR(100),
    created_at TIMESTAMP DEFAULT CURRENT_TIMESTAMP
);
Use relationships when you build APIs. Here are the types of relationships:
- One to many.
- Many to many.
Let’s take each one in depth.
One to Many
One user has many posts.
CREATE TABLE posts (
    id INT AUTO_INCREMENT PRIMARY KEY,
    user_id INT,
    title VARCHAR(255),
    body TEXT,
    created_at TIMESTAMP DEFAULT CURRENT_TIMESTAMP,
    FOREIGN KEY (user_id) REFERENCES users(id)
);
To get all posts from one user:
GET /api/users/15/posts
Many to Many
Users and roles are a good example. A user can have many roles, and a role can belong to many users.
You need a pivot table to join them:
CREATE TABLE roles (
    id INT AUTO_INCREMENT PRIMARY KEY,
    role_name VARCHAR(50)
);

CREATE TABLE user_role (
    user_id INT,
    role_id INT,
    PRIMARY KEY (user_id, role_id),
    FOREIGN KEY (user_id) REFERENCES users(id),
    FOREIGN KEY (role_id) REFERENCES roles(id)
);
You can query all roles for a user or all users with a role.
So, you have understood how to design databases. Let’s move on to the next section to see how to version APIs.
Version an API in PHP
There are two main ways to add versions: in the URL or in the request header. Let’s take each one in-depth.
URI Versioning (/api/v1/)
This method puts the version inside the URL. Here is an example:
$uri = $_SERVER['REQUEST_URI'];

if (strpos($uri, '/api/v1/') === 0) {
    echo "This is version 1 of the API.";
} elseif (strpos($uri, '/api/v2/') === 0) {
    echo "This is version 2 of the API.";
} else {
    http_response_code(400);
    echo json_encode(['message' => 'Invalid API version']);
}
Some URL examples:
- /api/v1/users
- /api/v2/users
- /api/v1/posts
This method includes the version in every request.
Header-Based Versioning
This method puts the version inside the request header.
Here is an example:
function getApiVersion() {
    $headers = getallheaders();
    return isset($headers['X-API-Version']) ? $headers['X-API-Version'] : 'v1';
}

$version = getApiVersion();

if ($version === 'v1') {
    echo "This is version 1 of the API.";
} elseif ($version === 'v2') {
    echo "This is version 2 of the API.";
} else {
    http_response_code(400);
    echo json_encode(['message' => 'Invalid API version']);
}
Client request looks like this:
GET /api/users
X-API-Version: v2
Here, you put the version of the API in the header, not in the URL.
Wrapping Up
In this article, you learned how RESTful APIs work in PHP and how to build one from start to finish. The steps covered everything from A to Z.
Here is a quick recap:
- RESTful APIs use simple HTTP methods to send and receive data.
- Clean URLs were configured using Apache’s
.htaccessor Nginx’stry_files. - Requests and responses were handled with JSON output and proper status codes.
- CRUD endpoints were built using plain PHP and MySQL without a framework.
- Input validation and structured error handling were added.
- Token-based authentication and role-based access control secured the API.
- Middleware handled logging, auth checks, and rate limiting.
- Versioning helped manage changes without breaking existing clients.
- Consistent response formatting and pagination improved the client experience.
FAQ’s
Do I need a framework like Laravel or Slim to build a RESTful API in PHP?
How can I secure my API?
What is the best way to handle different API versions?
/api/v1/ or check a version header in the request. Keep older versions working to avoid breaking clients.